Build Your Own
File Server
Build yourself a secure file server using any old
computer with a couple of hard drives and store
all your data centrally
 Every oi ce that generates large amounts of data needs a fi le server so that users can access
it all from a central location. The sole purpose of a fi le server is to provide the users on the network with fi les. Additionally, fi le servers can also provide data to other users over the internet via a website or FTP service. A fi le server is nothing but a simple computer with ample storage space, running a server operating system and confi gured with data backup or synchronizing software. The hardware is usually designed using special purpose processors, RAM, motherboards, hard drives, power supply units and cabinets so the server is able to be powered on 24x7. So they have to be rugged and ei ciently cooled too.The main component of a server is the storage space, but using a single spacious hard drive will not serve the purpose. The drives should also be highly ei cient in terms of speed, should have a large volume, and last but not the least, they should be secure enough to keep your data safe. Hence, they are usually onfi gured in RAID, where multiple hard drives are deployed to ensure speed and safety during data transfers. Hard drives can be confi gured in RAID using dif erent modes— RAID 0, 1, 5, 10 or 01. While RAID 0 is considered the fastest as it uses the
data striping feature, RAID 1 is the safest as it uses data mirroring. but both have their advantages and disadvantages. RAID 5, 10 and 01 are combinations, which uses both striping and mirroring to form fast and safe storage. We will show you how to confi gure a simple fi le server which uses RAID 0 or RAID 1 using two SATA hard drives and an old computer. You can also use multiple hard drives to form a RAID 5, 10 or 01 volume.Note: To create a RAID volume, the hard drives must be of the same type, speed and capacity, otherwise the one with the lesser of these features will bring down the ei ciency of the entire group. A file server is usually untouched, except for maintenance such as application installation, user confi guration or fi xing breakdowns. You can build your
own server and leave it behind a desk, in a loft or hidden inside a cabinet, but the place it's set up in should be spacious, well ventilated and easily accessible for maintenance. The monitor, keyboard
and mouse can be disconnected until required.
Requirements
Any old desktop computer. A Pentium
4 or higher is preferable.
Two or more similar SATA hard drives.
2 GB RAM should be enough, unless
you have more to spare.
A PCI SATA RAID card, unless your
motherboard features built-in RAID.
An operating system. A server edition
is highly recommended if there are many users accessing it. Let’s begin. Open and clean the old computer thoroughly and ensure a dust-free interior for ei cient cooling. Install a PCI SATA RAID card into a vacant PCI expansion slot and screw it in place, unless your motherboard features an onboard RAID controller. Install the two (or more) hard drives in the respective
bays and connect the necessary cables (data and power). Confi rm that all cables
are neatly tied and tucked away from the cooling fans and ducts to ensure proper air circulation. Oncedone, your hardware is ready to become a server.Now is the time to install the operating
system, but before this, you will need to confi gure the hard drives in RAID. If your
motherboard features RAID, then simply go to the BIOS setup and confi gure the
two hard drives in RAID 0 or 1 and exit. If you are using a PCI RAID card, then
you will have to press the necessary keys displayed on the screen while the system
is starting up to enter the card’s BIOS. Here again, confi gure the hard drives in
RAID and save the settings. You’re fi nally done confi guring the hardware. If you
want a secure storage system, use the RAID 1 confi guration, and if speed is the requirement, go for RAID 0. Note: Hard drives in RAID 0 will allow the total combined capacity to be used
while RAID 1 of ers half the combined storage space. For Example: RAID 0: 80 GB + 80 GB = 160 GB and RAID 1: 80 GB + 80 GB = 80 GB.
Procedure
Begin installing the operating system. You can use a Microsoft Windows Server Edition OS (recommended) or a Linux OS. We have used Windows XP as the OS as an old computer would already have a licensed operating system. During the installation, you might be prompted to install the drivers for the RAID hardware so that the OS can recognize the storage/volume type. Insert the driver CD that came with the motherboard or the PCI RAID card. The setup will then detect
the storage space and you can continue installing the operating system as usual.
Your fi le server is now fi nally ready to be confi gured. Once the OS is installed,
make sure you have installed all the drivers and created all the users and their
profiles as per the requirement of your network. Copy your data to the storage
drives and share the respective folders with appropriate user rights. That’s it!
Your file server is ready to be deployed. Just connect the server to the network
after configuring the network card and then disconnect the monitor, keyboard and mouse.
Now that your server is on duty, there are some things that you should
also consider. Use a UPS to avoid data loss during power failures, install an
exhaust fan in case you are keeping it in an enclosed area, install an antivirus software for additional security, install and keep running a password protected virtual networking software so that you can access the server from another computer on the network instead of
connecting a monitor and input device and operating the server. Additionally, we also recommend a few changes to your server hardware. Since you are using an older computer, replacing the power supply unit would be a good idea as this component might fail when used 24x7.
Additionally, to lower the noise of multiple hard drives spinning inside the cabinet,
design some foam or rubber sleeves for the hard drives to dampen the vibrations.
Finally, use the power saving and/or WOL feature of the motherboard to power down the hard drives or system when the server is not being used. This will not only save power, but will also prolong the life of the server’s hardware. Your fi le server is finally ready for action. Let it serve you betterNow that your fi le server is ready and serving its purpose on the network, why not use the entire eficiency of the server for other purposes to enhance your business productivity or home
convenience. As we mentioned earlier, fi le servers are nothing but simple computers,
and you can use them for multiple purposes apart from simply sharing a folder or drive. Some other applications that can be installed on the server to juice-out some additional functionality.
Media server: Install a media server application and store your complete collection of audio and
video fi les on the server and stream them to all the computers or handheld gadgets from a centrally
located location. Examples: iTunes, IceCast, Unreal
 HTTP server: Host your own website from home or
oi ce using an
HTTP server.
All you need is a live IP address from
your internet service provider. You don’t
need to worry about web space because
your server’s storage space is the limit.
Website down time is zeroed as your
server would be online all the time in your
own premises. Finally, hosting charges
are nil as you own the server. Examples:
Apache HTTP server, Xerver.
FTP server: Allow your friends and

clients to access your
data fi les or upload their
data to your server using
the FTP service. Here
too you would require a
live IP address from your ISP. Examples:
Xerver, FileZilla, Xlight, WinFTP.
Printer server: Install printer(s) on
the file server and share them across the
 network. You don’t need to worry about
the printers connected to client machines
on the network being shut down. All your
printers can be in one location at home
or oi ce.
Database servers: Centrally feed
in all your data and share it w ith a
database management software to
make information available to all users
on the network. Examples: SQL, Oracle,
Microsoft Access, FileMaker.
Accounting server: Similar to a
database server, multi-user accounting
server applications can be installed to
provide multi-user access to accountants
on the network. Examples: Tally, Busy.
 Proxy server:
Proxy servers
help internet
usage on the
local network
work much faster
because of their caching feature. You
can create user profi les to induce profi les
to authenticate users or even block
particular websites. Examples: FreeProxy,
AnalogX, CCProxy.
Download server: Employ the server to be a single point for downloading fi les and torrents from the Internet. This is benefi cial as the server can be used for
managing all your data downloads by taking the benefi ts of its 24-hour uptime. Examples: DAP, FlashGet, uTorrent, BitComet.Backup server: Install backup or
synchronizing software on the server and confi gure it in such a way that it can automatically backup crucial data from all the machines on the local network at specifc intervals. This would ensure that,
apart from client machines, a copy of all your data exists on the server. Example:
Fbackup, AceBackup.Mail server: Mail servers can be very
beneficial on a local network. Users can send and receive mails to the fi le
server, which will do the job of sendingemails outside or collecting emails and
distributing emails from an online POP server to local users. Also send emails
internally without the need of using Internet bandwidth. Example: hMailServer,
netMailshar, Winmail, CMailServerSecurity monitor: Using a video
security monitoring software, your fi le
server can also act as a surveillance unit by recording video feeds from webcams
and IP cameras. Example: WebcamXP,
SmarterGuard Basic.

 Safety first
Data on a fi le server is important and
should be kept safe and secure at all
times. Backing up the server frequently is
a must as you would need to keep your
data safe in extreme cases such as virus
attacks, hard drive errors, bad sectors,
accidental wipeouts, etc. Keeping your
data safe means you should replicate
your data from the server onto another
machine or external storage medium from
time to time.
In case of a server crash or hardware
failure, your data on the fi le server can
be lost. The only form of backing up
your server is mirroring or synchronizing
your data completely to another external storage or machine. Numerous
applications such as GoodSync, Vice Versa and such are available online
which can help synchronize your data to have a secure backup system. We
will use SyncBackSE as an example for synchronizing/mirroring software. You can download a 30-day trial from ‘www.2brightsparks.com’ and if you would like to buy it, the utility is available
for $30 (approx Rs 1,500) onwards. SyncBackSE is a powerful utility that
helps automatically copy fi les and folders from a defi ned location to another, be it
on the local drives, NAS, external storage drives, or even FTP servers.
Install and start the application and click on ‘Profiles | New’. Enter a name
to diferentiate between profiles if you are creating multiple profi les, and click
‘Next’. In the following screen, click on the type of synchronization from ‘Backup’,
‘Synchronize’, ‘Mirror’, or Group’. Mirroring is useful as fi le servers need
to be replicated to save space and create an exact folder structure as the original
ones in case of a system crash. You can opt for synchronize or backup if you wish
to keep copies of older deleted data too,but the destination disk space might fall
short over time. In the next screen, you can choose to backup/sync from or to an FTP server.
If you don’t have any, skip this screen. Now enter a description name for the
source fi les and select the source folder and click ‘Next’. Do the same for the destination folder at the next screen.
Now define your preferred method and period of the mirroring of data. Click on
‘When’ from the left panel and then on Edit Schedule’ and the utility will ask you
to enter your current user password for security. Enter the details and adjust the
date and time along with the period of recurrence according to your choice of
mirroring. Ideally, a recurring period of one hour, daily, should be ideal in case
your server’s data is updated at regular intervals.
If you are sure that your server data changes after longer periods, you can
change the profi le to run every two or seven days. Now that the profi le
is completely ready, you can activate it and it will run automatically in
the background at the specifi ed time intervals. Similarly, you can create
multiple profi les to have a safer backup by defining dif erent folders or data
specific folders to diferent backup
locations. Mirroring the data from your file server automatically is essential via an
automated backup or synchronizing utility so that you do not have to waste
time performing these essential chores manually each day or every week.
File Server
Build yourself a secure file server using any old
computer with a couple of hard drives and store
all your data centrally

it all from a central location. The sole purpose of a fi le server is to provide the users on the network with fi les. Additionally, fi le servers can also provide data to other users over the internet via a website or FTP service. A fi le server is nothing but a simple computer with ample storage space, running a server operating system and confi gured with data backup or synchronizing software. The hardware is usually designed using special purpose processors, RAM, motherboards, hard drives, power supply units and cabinets so the server is able to be powered on 24x7. So they have to be rugged and ei ciently cooled too.The main component of a server is the storage space, but using a single spacious hard drive will not serve the purpose. The drives should also be highly ei cient in terms of speed, should have a large volume, and last but not the least, they should be secure enough to keep your data safe. Hence, they are usually onfi gured in RAID, where multiple hard drives are deployed to ensure speed and safety during data transfers. Hard drives can be confi gured in RAID using dif erent modes— RAID 0, 1, 5, 10 or 01. While RAID 0 is considered the fastest as it uses the
data striping feature, RAID 1 is the safest as it uses data mirroring. but both have their advantages and disadvantages. RAID 5, 10 and 01 are combinations, which uses both striping and mirroring to form fast and safe storage. We will show you how to confi gure a simple fi le server which uses RAID 0 or RAID 1 using two SATA hard drives and an old computer. You can also use multiple hard drives to form a RAID 5, 10 or 01 volume.Note: To create a RAID volume, the hard drives must be of the same type, speed and capacity, otherwise the one with the lesser of these features will bring down the ei ciency of the entire group. A file server is usually untouched, except for maintenance such as application installation, user confi guration or fi xing breakdowns. You can build your
own server and leave it behind a desk, in a loft or hidden inside a cabinet, but the place it's set up in should be spacious, well ventilated and easily accessible for maintenance. The monitor, keyboard
and mouse can be disconnected until required.
Requirements
Any old desktop computer. A Pentium
4 or higher is preferable.
Two or more similar SATA hard drives.
2 GB RAM should be enough, unless
you have more to spare.
A PCI SATA RAID card, unless your
motherboard features built-in RAID.
An operating system. A server edition
is highly recommended if there are many users accessing it. Let’s begin. Open and clean the old computer thoroughly and ensure a dust-free interior for ei cient cooling. Install a PCI SATA RAID card into a vacant PCI expansion slot and screw it in place, unless your motherboard features an onboard RAID controller. Install the two (or more) hard drives in the respective
bays and connect the necessary cables (data and power). Confi rm that all cables
are neatly tied and tucked away from the cooling fans and ducts to ensure proper air circulation. Oncedone, your hardware is ready to become a server.Now is the time to install the operating
system, but before this, you will need to confi gure the hard drives in RAID. If your
motherboard features RAID, then simply go to the BIOS setup and confi gure the
two hard drives in RAID 0 or 1 and exit. If you are using a PCI RAID card, then
you will have to press the necessary keys displayed on the screen while the system
is starting up to enter the card’s BIOS. Here again, confi gure the hard drives in
RAID and save the settings. You’re fi nally done confi guring the hardware. If you
want a secure storage system, use the RAID 1 confi guration, and if speed is the requirement, go for RAID 0. Note: Hard drives in RAID 0 will allow the total combined capacity to be used
while RAID 1 of ers half the combined storage space. For Example: RAID 0: 80 GB + 80 GB = 160 GB and RAID 1: 80 GB + 80 GB = 80 GB.
Procedure
Begin installing the operating system. You can use a Microsoft Windows Server Edition OS (recommended) or a Linux OS. We have used Windows XP as the OS as an old computer would already have a licensed operating system. During the installation, you might be prompted to install the drivers for the RAID hardware so that the OS can recognize the storage/volume type. Insert the driver CD that came with the motherboard or the PCI RAID card. The setup will then detect
the storage space and you can continue installing the operating system as usual.
Your fi le server is now fi nally ready to be confi gured. Once the OS is installed,
make sure you have installed all the drivers and created all the users and their
profiles as per the requirement of your network. Copy your data to the storage
drives and share the respective folders with appropriate user rights. That’s it!
Your file server is ready to be deployed. Just connect the server to the network
after configuring the network card and then disconnect the monitor, keyboard and mouse.
Now that your server is on duty, there are some things that you should
also consider. Use a UPS to avoid data loss during power failures, install an
exhaust fan in case you are keeping it in an enclosed area, install an antivirus software for additional security, install and keep running a password protected virtual networking software so that you can access the server from another computer on the network instead of
connecting a monitor and input device and operating the server. Additionally, we also recommend a few changes to your server hardware. Since you are using an older computer, replacing the power supply unit would be a good idea as this component might fail when used 24x7.
Additionally, to lower the noise of multiple hard drives spinning inside the cabinet,
design some foam or rubber sleeves for the hard drives to dampen the vibrations.
Finally, use the power saving and/or WOL feature of the motherboard to power down the hard drives or system when the server is not being used. This will not only save power, but will also prolong the life of the server’s hardware. Your fi le server is finally ready for action. Let it serve you betterNow that your fi le server is ready and serving its purpose on the network, why not use the entire eficiency of the server for other purposes to enhance your business productivity or home
convenience. As we mentioned earlier, fi le servers are nothing but simple computers,
and you can use them for multiple purposes apart from simply sharing a folder or drive. Some other applications that can be installed on the server to juice-out some additional functionality.
Media server: Install a media server application and store your complete collection of audio and
video fi les on the server and stream them to all the computers or handheld gadgets from a centrally
located location. Examples: iTunes, IceCast, Unreal

oi ce using an
HTTP server.
All you need is a live IP address from
your internet service provider. You don’t
need to worry about web space because
your server’s storage space is the limit.
Website down time is zeroed as your
server would be online all the time in your
own premises. Finally, hosting charges
are nil as you own the server. Examples:
Apache HTTP server, Xerver.
FTP server: Allow your friends and

clients to access your
data fi les or upload their
data to your server using
the FTP service. Here
too you would require a
live IP address from your ISP. Examples:
Xerver, FileZilla, Xlight, WinFTP.
Printer server: Install printer(s) on
the file server and share them across the

the printers connected to client machines
on the network being shut down. All your
printers can be in one location at home
or oi ce.
Database servers: Centrally feed
in all your data and share it w ith a
database management software to
make information available to all users
on the network. Examples: SQL, Oracle,
Microsoft Access, FileMaker.
Accounting server: Similar to a
database server, multi-user accounting
server applications can be installed to
provide multi-user access to accountants
on the network. Examples: Tally, Busy.

Proxy servers
help internet
usage on the
local network
work much faster
because of their caching feature. You
can create user profi les to induce profi les
to authenticate users or even block
particular websites. Examples: FreeProxy,
AnalogX, CCProxy.
Download server: Employ the server to be a single point for downloading fi les and torrents from the Internet. This is benefi cial as the server can be used for
managing all your data downloads by taking the benefi ts of its 24-hour uptime. Examples: DAP, FlashGet, uTorrent, BitComet.Backup server: Install backup or
synchronizing software on the server and confi gure it in such a way that it can automatically backup crucial data from all the machines on the local network at specifc intervals. This would ensure that,
apart from client machines, a copy of all your data exists on the server. Example:
Fbackup, AceBackup.Mail server: Mail servers can be very
beneficial on a local network. Users can send and receive mails to the fi le
server, which will do the job of sendingemails outside or collecting emails and
distributing emails from an online POP server to local users. Also send emails
internally without the need of using Internet bandwidth. Example: hMailServer,
netMailshar, Winmail, CMailServerSecurity monitor: Using a video
security monitoring software, your fi le
server can also act as a surveillance unit by recording video feeds from webcams
and IP cameras. Example: WebcamXP,
SmarterGuard Basic.

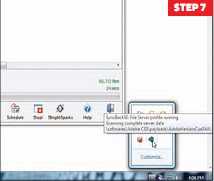
 |
| click on image for full size |
Data on a fi le server is important and
should be kept safe and secure at all
times. Backing up the server frequently is
a must as you would need to keep your
data safe in extreme cases such as virus
attacks, hard drive errors, bad sectors,
accidental wipeouts, etc. Keeping your
data safe means you should replicate
your data from the server onto another
machine or external storage medium from
time to time.
In case of a server crash or hardware
failure, your data on the fi le server can
be lost. The only form of backing up
your server is mirroring or synchronizing
your data completely to another external storage or machine. Numerous
applications such as GoodSync, Vice Versa and such are available online
which can help synchronize your data to have a secure backup system. We
will use SyncBackSE as an example for synchronizing/mirroring software. You can download a 30-day trial from ‘www.2brightsparks.com’ and if you would like to buy it, the utility is available
for $30 (approx Rs 1,500) onwards. SyncBackSE is a powerful utility that
helps automatically copy fi les and folders from a defi ned location to another, be it
on the local drives, NAS, external storage drives, or even FTP servers.
Install and start the application and click on ‘Profiles | New’. Enter a name
to diferentiate between profiles if you are creating multiple profi les, and click
‘Next’. In the following screen, click on the type of synchronization from ‘Backup’,
‘Synchronize’, ‘Mirror’, or Group’. Mirroring is useful as fi le servers need
to be replicated to save space and create an exact folder structure as the original
ones in case of a system crash. You can opt for synchronize or backup if you wish
to keep copies of older deleted data too,but the destination disk space might fall
short over time. In the next screen, you can choose to backup/sync from or to an FTP server.
If you don’t have any, skip this screen. Now enter a description name for the
source fi les and select the source folder and click ‘Next’. Do the same for the destination folder at the next screen.
Now define your preferred method and period of the mirroring of data. Click on
‘When’ from the left panel and then on Edit Schedule’ and the utility will ask you
to enter your current user password for security. Enter the details and adjust the
date and time along with the period of recurrence according to your choice of
mirroring. Ideally, a recurring period of one hour, daily, should be ideal in case
your server’s data is updated at regular intervals.
If you are sure that your server data changes after longer periods, you can
change the profi le to run every two or seven days. Now that the profi le
is completely ready, you can activate it and it will run automatically in
the background at the specifi ed time intervals. Similarly, you can create
multiple profi les to have a safer backup by defining dif erent folders or data
specific folders to diferent backup
locations. Mirroring the data from your file server automatically is essential via an
automated backup or synchronizing utility so that you do not have to waste
time performing these essential chores manually each day or every week.